
English 
+86-157-6313-9515
lina@hezongmaterials.com
lina@hezongmaterials.com
26 Jiashan Road, Chucun Town, Weihai City, Shandong Province, China


Views: 0 Author: Site Editor Publish Time: 2026-05-12 Origin: Site


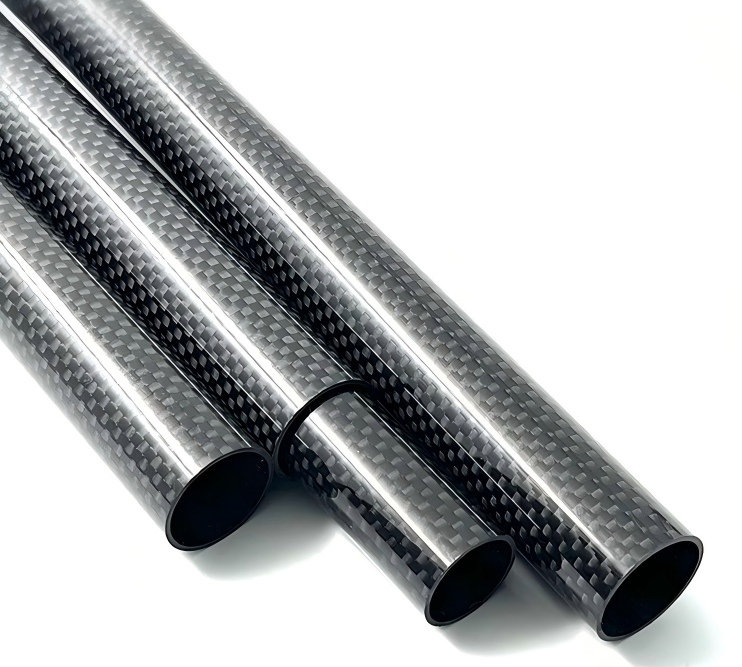
Replacing a damaged panel costs a small fortune today. Many enthusiasts naturally consider DIY repair to save cash. However, patching advanced composites differs vastly from fixing standard metal. You cannot treat it like ordinary fiberglass. You must match resin compatibility perfectly. You also have to consider weave aesthetics. Structural integrity remains the absolute top priority throughout the process.
Do not expect flawless magic from a garage repair. A structural patch rarely replicates the factory weave exactly. Light will catch the new fibers differently. Your primary goal here is restoring core strength. You want a flush, weather-sealed finish. We will guide you through this exact process. You will learn how to prep the surface safely. We cover everything from assessing the initial damage to curing your final clear coat.
Size Limits: Holes under 1 inch are generally safe for DIY patching; damage exceeding 2 inches or located near hinges/latches typically requires full hood replacement.
Material Rules: Always use epoxy resin, as standard automotive polyester resins can degrade the carbon and melt underlying foam support structures.
Surface Prep is Critical: Proper adhesion requires "stepped" sanding and chemical degreasing (acetone) to prevent patch delamination.
Specialized Fixes: Micro-pinholes and worn fastener holes require distinct, targeted techniques rather than standard patch kits.
You must weigh the immediate material costs against safety benefits. A DIY repair demands hours of meticulous labor. Sometimes, a replacement simply makes more sense. You need to identify whether a patch will actually hold up under highway speeds. Aerodynamic pressure places immense stress on front-end body panels.
The "1-Inch Rule" offers a reliable baseline for beginners. Holes, punctures, or deep gouges under one inch in diameter serve as prime candidates for wet-layup repairs. You can safely fix these smaller voids. They rarely compromise the overall skeleton. Keep your repairs restricted to non-load-bearing areas.
You must also distinguish cosmetic damage from structural failure. Cosmetic damage includes top-layer clear coat chips. It covers shallow micro-punctures. Structural damage runs much deeper. It penetrates the underlying ribbing. It compromises the inner skeleton. You should never ignore structural damage.
Certain red lines demand immediate panel replacement. You must never patch holes near latch mechanisms. Avoid fixing hinge mounts. If the panel exhibits extensive spider-web cracking, stop immediately. Cracks radiating more than two inches from the impact zone indicate severe structural failure. You risk catastrophic panel detachment at high speeds.
| Damage Type | Characteristics | Recommended Action |
Minor Cosmetic | Clear coat chips, small pinholes, surface scratches. | Sand, degrease, and re-apply UV clear coat. |
Small Puncture | Hole under 1 inch, no skeletal damage. | Perform a standard epoxy wet-layup patch. |
Structural / Skeleton | Broken ribs, latch damage, cracks over 2 inches. | Replace the entire panel immediately. |
Successful repairs rely entirely on proper chemistry. You cannot cut corners on raw materials. Cheap substitutes will ruin the panel. You need specific tools to ensure a permanent bond.
Resin & Hardener: You must buy a 2-part marine-grade composite epoxy resin. Never use cheap polyester fiberglass resins. Polyester lacks proper adhesive strength. It also melts internal foam support structures instantly.
Reinforcement Fabric: Purchase a 2x2 or 3x3 twill weave carbon fiber cloth. You want to match the existing factory pattern. This helps hide the repair under the final clear coat.
Abrasives: Gather multiple grits of sandpaper. You need 80-100 grit for roughing the scarf joint. You need 120-180 grit for blending the edges. Finally, acquire 200-400 grit for the final smoothing phase.
Chemical Preps: Keep acetone or isopropyl alcohol nearby. You need these solvents for deep chemical degreasing.
Consumables & PPE: Buy calibrated mixing cups. Epoxy requires exact 1:1 or 2:1 ratios. Grab masking tape and chemical-resistant gloves. You must wear a particulate respirator. Sanding composite dust poses severe respiratory hazards.
Follow these standard operating procedures strictly. Skipping a single step often leads to immediate delamination. We recommend working in a well-ventilated, temperature-controlled garage. Extreme humidity ruins epoxy curing times.
Step 1: Clean and Degrease. Flush the entire damaged area heavily. Use pure acetone. You must remove all road oils. Engine bay residues prevent chemical bonding. Wipe the area completely dry.
Step 2: Create a "Stepped" Sanding Profile. Grab your 80-100 grit sandpaper. Grind a tapered, shallow crater around the hole. We call this a scarf joint. Extend this crater two to three inches outward. This technique drastically increases the surface area. The epoxy needs this extra texture to bite into.
Step 3: Base Support. Full-penetration holes require a backing layer. Gravity will pull wet resin right through the void. Apply a temporary aluminum backing tape underneath. You can also use thin structural foam. Verify the foam handles epoxy safely before applying it.
Step 4: Wet Layup. Mix your epoxy precisely using calibrated cups. Wet out the reinforcement patch thoroughly. Apply the saturated patch directly to the stepped area. Grab a plastic spreader. Work out all trapped air bubbles aggressively. Air voids create massive structural weak points.
Step 5: Cure and Contour. Walk away. Allow six to eight hours for room-temperature curing. Once fully hardened, begin block-sanding. Start roughing it down using 120 grit. Switch to 200-400 grit next. Sand it until the patch sits perfectly flush against the surrounding panel.
Step 6: Clear Coat Sealing. Raw epoxy turns yellow under direct sunlight. You must protect it. Apply a high-quality UV-resistant automotive clear coat. This restores the glossy finish. It seals the repair against moisture intrusion.
Standard patch kits fail in specific micro-scenarios. Sometimes you encounter tiny voids. Sometimes you face elongated mounting points. You need specialized techniques to tackle these unique frustrations.
Resin infusion processes sometimes leave microscopic pinholes. Standard polishing will never fix deep pinholes. Heavy machine polishing actually ruins the thin factory resin layer. You will expose raw dry fibers.
You need a targeted solution. Use a Dremel tool equipped with a tiny rubber tip. Alternatively, fold a piece of 400-grit sandpaper into a sharp point. Scuff the exact bottom of the pinhole manually. You must create a rough surface inside the tiny crater. Degrease it carefully. Next, dab a 2-part clear coat directly into the hole. Use a micro-brush for precision. Ensure the fresh fill sits slightly proud. It needs to look raised. Epoxy shrinks slightly during curing. Once it fully cures, wet-sand the raised bump completely flat.
Track cars utilize quick-release Dzus fasteners. High-vibration areas cause these holes to wallow out over time. A standard fabric patch won't hold up here. The continuous friction destroys regular weaves.
You must rebuild the actual hole edge. Mix a highly thickened epoxy batch. Blend standard epoxy together with milled glass. You can also use carbon flock. This creates a dense, structural putty. Pack this mixture into the worn void. Let it cure rock-hard. Finally, re-drill the hole to the precise fastener diameter. The new reinforced edge handles vibration beautifully.
Sometimes you do not need an exposed weave finish. Track cars suffer constant abuse. Budget builds often get fully painted. Many owners simply wrap their panels in vinyl. In these specific cases, a full wet-layup wastes time.
You can substitute the composite cloth entirely. Use standard automotive body filler instead. Mechanics call this Bondo. Prep the hole normally. Pack the void full of body filler. Sand it perfectly smooth. Prime the area. Paint or wrap over the repair.
This technique offers specific pros and cons. It proves significantly faster. It costs practically nothing compared to epoxy systems. However, it offers zero structural strength. A filler patch shatters under heavy flexing. It completely sacrifices the exposed aesthetic. Use this method only for non-critical, aesthetic surface leveling.
You must inspect the cured patch rigorously. Safety relies on your honest evaluation. Press firmly on the repaired area. Check for any obvious delamination. Feel around for soft spots. Tap the patch lightly. A dull thud indicates trapped moisture or air voids. The surface should feel entirely continuous to your touch.
You need to perform an aesthetic reality check too. Acknowledge the visual differences. The new patch weave will likely catch the light differently. The factory mold uses massive pressure. Your garage repair relies on hand pressure. The transition boundary often remains slightly visible under the clear coat. Accept this minor visual flaw as a badge of a successful DIY fix.
Sometimes, repairs simply fail. If the patch fails your safety checks, do not drive the car. If the result looks terribly unacceptable, rethink your strategy. If the structural integrity feels compromised under heavy hand pressure, highway wind loads will destroy it. At this point, transition your focus. Start exploring OEM-quality replacement carbon fiber panels to guarantee your safety.
Patching composite panels remains highly achievable for minor damage. You can restore panel strength easily in your own garage. You just need to follow strict chemical rules. You must execute careful sanding protocols. Never rush the curing process. Always measure your mixing ratios meticulously.
Always prioritize your personal safety. A hood flying open at highway speeds causes catastrophic accidents. Safety and structural integrity must always override your desire to save money. If the damage exceeds the one-inch rule, or if it impacts a mounting point, buy a new part. Upgrading to a brand new carbon fiber hood often provides unmatched peace of mind.
A: No, polyester/fiberglass resin has poor adhesion to carbon and can melt underlying foam cores; use epoxy.
A: Typically 6-8 hours at room temperature, though full cross-linking can take 24 hours depending on the hardener speed.
A: Rarely. The patch will restore shape and strength, but the weave transition will usually be visible under clear coat.
A: No. Latch and hinge mounting points bear extreme aerodynamic loads and should never be DIY patched.


